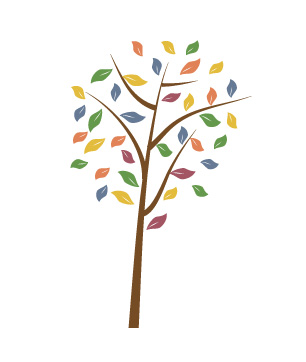
Checking into my blog to say hello to my readers. Above is a tree illustration, once again. This one comes with a story (paraphrased in my own words):
Once upon a time there was a traveler. He was quite weary, hungry and thirsty. He happened upon this beautiful tree. There was a stream flowing by the tree, so he helped himself to a refreshing drink of the water. There were fruits in the tree, so he ate of the fruit. He laid down under the tree and took a nap. When he awoke, he was refreshed and well-rested. Before leaving, he turned to the tree. Tree, oh, tree, how can I bless you? For you have so much already. So he blessed the tree with more of the same.
Source: Taanit 5B-6A
For those that read Hebrew, here is the original Hebrew of what the traveler says to the tree:
אילן אילן במה אברכך, שיהיו פירותיך מתוקין, הרי פירתיך מתוקין, שיהא צילך נאה, הרי צלך נאה. אלא יהי רצון שכל נטיעותיך יהיו כמותך.
Have you ever been grateful to something in nature? Or perhaps grateful to someone in your life who has given you so much?
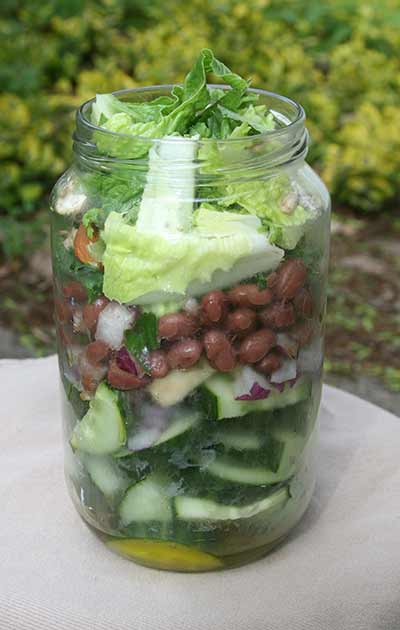
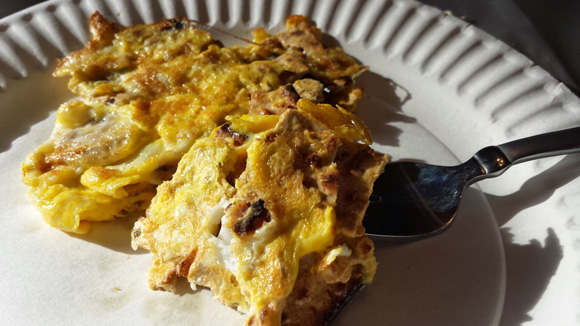
Summer approaches: more opportunities to take food on the go. What do you eat when you travel? Have you ever made salad in a jar?
Last week I drove to U. of Maryland and back to pick up my son. I made my salad in a jar the day before. The only “rules” are put the green leafy vegetables like lettuce on the top, and have the dressing on the bottom. Then, when you are ready to eat, tip over the jar so the dressing runs all through the ingredients. Make sure to bring a fork and plate. It is difficult to eat salad in a jar if you don’t have a desk or table handy. Next time I travel maybe I will try a plastic bowl for the salad (not for storing it, just for eating it).
First, I will list the ingredients in my salad in a jar. Then I will make a list of all sorts of ideas of what one can put in the jar. Feel free to add your own food ideas in the comments.
Ingredients for One Version of Salad in a Jar
romaine lettuce – torn into pieces
raw kale – torn into pieces
bits of sunflower seeds, pumpkin seeds, chopped nuts
bean salad – I had a leftover bean salad I had made for Shabbat. It already had a light, garlicky dressing and bits of red onion and fresh oregano.
cucumber – chopped into pieces
dressing – olive oil, raw apple cider vinegar (add a few spices and salt/pepper to taste)
glass jar with wide top
fork and plate or bowl for eating
Make the Salad
Find a jar with a wide top. Locate all your ingredients and assemble them. If you don’t have enough ingredients, go to the store, walk through the produce section, and pick out some vegetables! Fruit might work, too. In my case, I chopped up cucumbers and a few red onions. I washed romaine lettuce and kale. I had already made a bean salad the day before.
My first layer is the dressing. I used only cold pressed olive oil and a tablespoon of apple cider vinegar. But in retrospect, a few spices might have been nice (salt, pepper, garlic powder, turmeric are possibilities). Then I added the chopped cucumbers. It is best to add heavy vegetables such as cucumbers, steamed cauliflower, or steamed brussel sprouts – something substantial that the rest of the salad can “sit” upon.
Then I sprinkled my chopped red onion. The bean salad went on top of that, followed by the kale and on top the romaine lettuce. I sprinkled some sunflower seeds and nuts on the top. I did have a hard boiled egg that I took on the side.
When you get to your destination, it is best to have a table or desk upon which to eat the salad. Be sure to take a fork! Turn the jar upside down so the dressing runs all over the lettuce. Put the salad on the plate, and enjoy. You may find this more than you can eat – it would be nice to share with a friend.
Comparison to a sandwich: it is much easier to eat a sandwich on the go. However, I much prefer the taste of this salad in a jar. And my body prefers it as well.
Long List of Ideas for Salad in a Jar
Lettuces: romaine, red leafy, green leafy, all kinds of leafy!
Greens: kale, spinach, watercress – it would be interesting to try some lightly cooked greens in the middle (you may not want it to touch the lettuces until serving time).
Hard boiled eggs (I stored mine separately)./li>
Hard cheese
Seeds – sunflower, pumpkin, chia seeds
Nuts – you may want to be careful about nuts because of the chocking hazard. Even an adult can choke – don’t move around when you eat.
Cucumbers
Beets – cooked, uncooked and sliced, fermented – but be aware you may end up with pink salad.
Turnips, Parsnips, chopped, shredded carrots
Cauliflower, brussel sprouts, broccoli – I would want them lightly-steamed
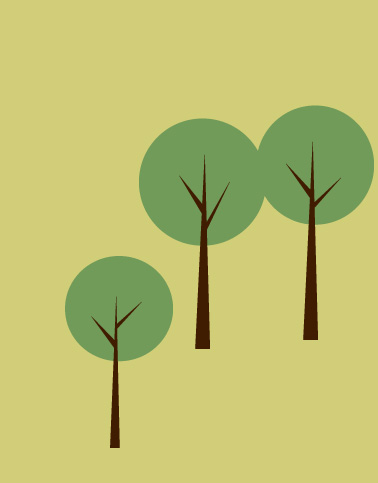
In a continuation of a banner that will have houses, trees, clouds and some text, I started working on trees. The one above is the one I like best, although I realized that I should get the tree trunk to be straighter if I want to use something similar in my banner. There are many details to construct, and getting everything to work together and not be too busy will be an interesting challenge.
This was my first set of “flat illustration trees.” These trees are made up of triangles and circles. One version of this had a grunge look added at the end (using Photoshop – the shapes where created in Illustrator). If you examine illustrations of flat design, you will often see trees depicted in a similar manner of only these basic shapes.
What makes an illustration “flat design”? How does it differ from other art? It’s missing the shadows. And it’s made up of simple shapes. It’s often vector art, so it can be made bigger or smaller without losing its look, unlike a photograph with pixels.
Both these two illustrations use the same twirly tree trunk. The bends of the tree trunk add a certain look that might go well with a different illustration – I think I will go with a straighter trunk, as the houses are quite straight as well. On the other hand, maybe a twisty trunk would be welcome next to a stiff, geometric house.
Of these illustrations, do you have a favorite? Any parts that you like in particular? Have you noticed flat design on any sites that you visit?
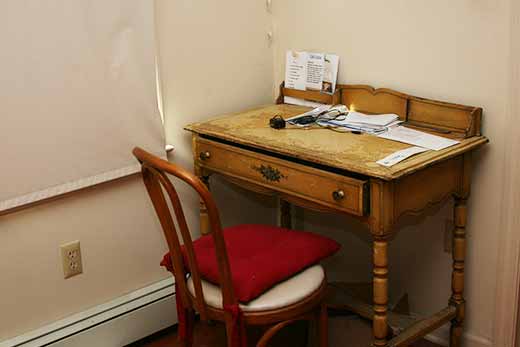
This writing desk used to belong to my mother z”l. My husband expressed some satisfaction when I he saw me use it one day as an actual desk. I was using it to address a few bat-mitzvah invitations. Which brings me to my next topic: blogging breaks. It seems that Purim stretched into pre-Pesach cleaning which then became Pesach and then a few busy work deadlines. Without strong intention I took a bit of a blogging break. I suppose ideally one should say, hello, I am taking a blogging break, but usually life is too busy for that sort of thing. Until after the bat-mitzvah I should just not plan on blogging very much. When it gets really hot in July, then I can get into the blogging swing again (I hate the heat and prefer air conditioning).
About the desk: my mother used to use it to write letters and organize recipes. I wish I had her collection of recipes – I assume it got thrown out at some point. The desk is quite fragile and is falling apart in pieces. I told the movers (we moved it from my father’s apartment after he died) that this was the last time the desk was moving (they didn’t want me to blame them for the broken pieces, and I don’t). But if my daughter gets attached to it, maybe it will move again. Who knows.
I was planning to write a post called Burning Bread and other Pesach Adventures. I have a great photo to go with that post. I’ll keep it in mind – maybe someday it will show up. My daughter was the Genie in a recent Highland Park Recreation production of Aladdin – if I had the energy, time and ideas, I might have posted about that. She was hilarious. Catch the next show on July 4th in Donaldson Park – no idea what that production will be.
I wish I were back doing watercolors – but too much else to do right now. Maybe in the summer? We’ve been having a gorgeous spring – it is quite therapeutic to go for a walk.
I highly recommend the book Like Dreamers: The Story of the Israeli Paratroopers Who Reunited Jerusalem and Divided a Nation by Yossi Klein Halevi. I would write a review, but I returned the book to my brother-in-law. I will just say this: it’s hard enough to write a biography of one person. Yossi Klein Halevi portrays quite a few varied people in this easy-to-read and engaging book.
Lorri is my mentor when it comes to writing book reviews. Read her review of Last Train to Istanbul.
Over to You, Dear Reader
How do you handle needed blogging breaks? Is there anything in particular you might say to your audience? Have you ever gotten attached to an old piece of furniture?
One of my favorite foods to eat on Pesach (Passover) is matza brei (that’s bri with a long i as in sky or apple pie). Here is the basic, basic recipe:
Ingredients
1 piece of square matza (can be regular, whole wheat or any other kind)
1 egg
1 or two pats of butter
Equipment
1 bowl
1 fork
1 frying pan
Take the egg. Crack it into the bowl. Stir. Crack matza into pieces, large or small matza pieces (your choice). Let matza soak (this is sort of like French toast, except unleavened). Put a pat of butter in the frying pan. Heat butter until it bubbles. Add egg-matza mixture. Cook a minute, stir, flip and cook the other side. Use the other pat of butter if necessary. When the egg is cooked but not too much, slide the matza brei unto a plate. Enjoy. Eat with a glass of orange juice, a cup of tea or coffee or plain water if you like.
Variations of Matza Brei
As my friend Larry reminded me when I posted my matza brei photo with short recipe on Google+, there are multiple varieties to this egg-y treat. I decided a fun addition to this post would be to list as many variations as I could think here; feel free to add your own in the comments.
Plain– plain is more or less as I posted it. Good if you are in a rush or you really do prefer plain. I like plain.
Salty – salty would be adding salt and maybe pepper, too.
Savory – I looked up savory, and it seemed to be defined by adding rosemary or thyme. I will include in this options like parsley, dill, scallions, onions, mushrooms and garlic. Of course, you might combine savory with salty as in herbs with salt and pepper.
Sweet – sugar is a common way to make sweet. You could do cinnamon sugar or add raisins. You could eat the cooked matza brei with jam (I would go for this one, as I like the sweet fruit kind).
Spicy – I’m adding another section to include cumin, coriander, turmeric, salsa, hot pepper or other spicy treats.
Note: not all observant Jews eat matza brei on Pesach. Some Jews do not eat grebrokhts, that is, matza dipped in a wet substance. My family tradition is to eat plenty of matza brei.
What do you prefer: plain, salty, savory or sweet? Or spicy or something else all together? Creamy? How would you prepare this dish?
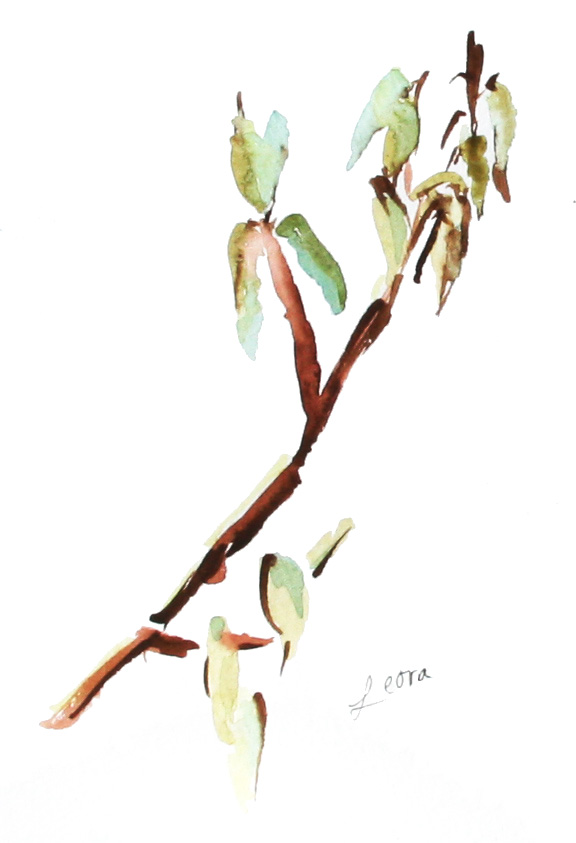
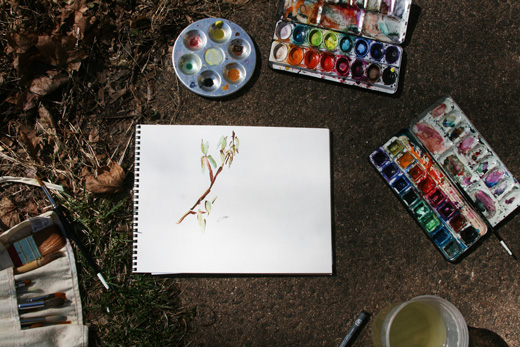
I participate in an online Facebook group called One Watercolor a Day, based on the book by Veronica Lawlor. There are many exercises in the book, and every few weeks I do an exercise and share it in the group. Recently, I’ve been sharing the watercolor exercises on this Sketching Out blog as well. The most recent exercise was Do a Study of Nature, and it was fun to sit outside and paint:
This particular painting is a sage leaves watercolor: I took a look at my sage plant that has come back year after year and did a little painting study. I once tried to plant more sage in the back of my yard, and those sage plants unfortunately died. This sage plant, however, that is close to my kitchen back door, has managed to re-emerge after many a winter. Happy that today was such a nice day, so I had an excuse to sit outside and paint in between cleaning my house for Passover.
I find sketching from nature a great way to learn – you really need to observe to come up with a little watercolor painting quickly. I did two others before I decided to limit my color palette and limit my subject to the sage leaves.
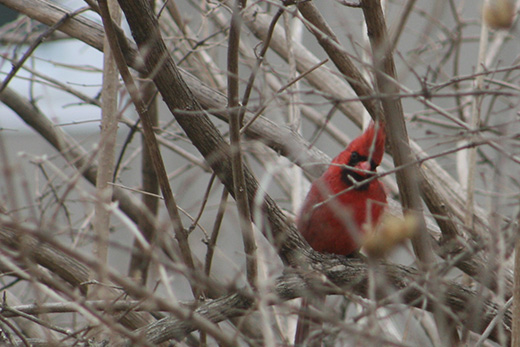
It has been a while since I’ve participated in a Nature Notes, one of my favorite online memes run by my friend Michelle over at Rambling Woods. Here is a cardinal shot I had in my stash but never got a chance to share until now:
Do you cook with sage? Do you have it in your yard? Have you ever painted outside?
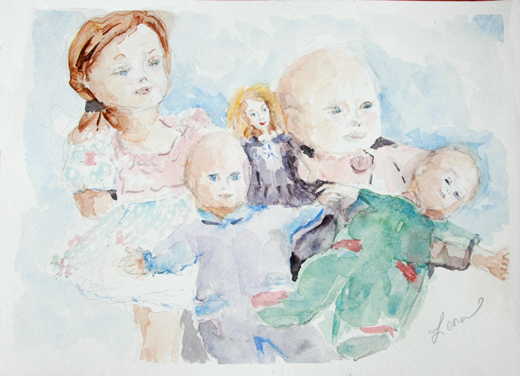
Baby dolls, barbie doll, American Girl doll watercolor painting on paper by Leora Wenger, March 2014
This watercolor of baby dolls, a barbie doll and an American Girl doll was painted in response to a One Watercolor a Day challenge to paint some children’s toys. I gathered some of my daughter’s dolls in a basket, sketched a simple drawing, then they sat for a few weeks as Purim came, was a busy, fun time, and went. I finally had the time to do the painting (don’t believe the part about one watercolor a day – once a week is great, once a month feels like how it needs to be right now). It was fun to watercolor baby dolls, but I’m not sure how much time I will have to do more watercolor painting for a while.
Now it is “sandwich time” – a totally made up term by myself, meaning the time between Purim and Pesach (Passover) in which observant Jews get their homes ready for Pesach. I call it sandwich in that not only are we squeezed at this time to figure out how to get ready, we also aim to get rid of anything resembling a sandwich, such as cookies, crackers, cereals, pasta, pretzels and plenty of other other starchy items. You know all those gluten-filled items you own? We probably can’t own them on Pesach. One of the nice features is if we have unopened non-perishable goods, we can donate them to a local food pantry. I even learned I can donate my unopened box of chickenless nuggets to Elijah’s food kitchen in New Brunswick. Not sure if I will make it there for one box, but I love the idea of someone else using the food.
Do you do anything special at this time of year: clean your house, start your garden, get ready for a holiday or prepare for a trip? What were your favorite toys as a child?
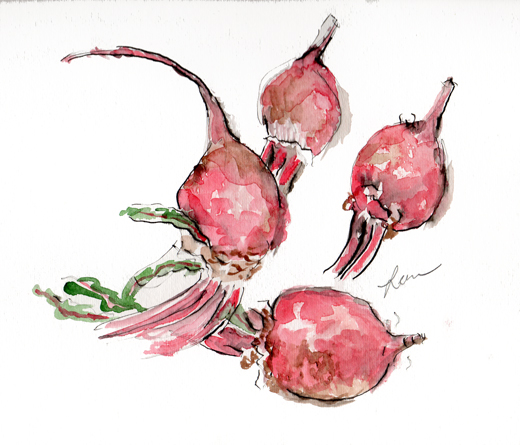
Beets, watercolor and ink pen on paper by Leora Wenger, January 2014
Beets and early spring: do you associate the two? In any case, I’ll teach you how to make fermented beets. You only need two food ingredients: a bunch of beets and some salt. We won’t be cooking the beets, although I did find recipes that cooked the beets before fermenting. Cooking might make it easier to digest, but it also might kill off some of the nutrients. And I like the crunch of raw beets. You will also need a sharp knife, a cutting board, a glass jar (a mason jar is fine), a small baby food jar, a piece of thin cloth and a rubber band.
Ingredients
3 or 4 beets
2 tsp. sea salt
water
Wash the beets as best you can and cut off the ends (the part with the leaves and the part that looks like a tail). Cut each beet in half once and slice as thin as you can. Place the beets in a glass jar with a wide top. Add sea salt. Add enough water to cover the beets. Place a small jar on top of the beets to push them down into the brine. The beets need to be submerged in water. Cover the jar with a thin cloth and hold the cloth in place with a rubber band. Wait about two weeks. Fermented beets! In the heat of the summer, you may only have to wait two days instead of two weeks. If you are fermenting for the first time, you should check it every few days to see how the flavor changes. Really, you should do that whenever you ferment, but in reality you might just move on to other things. If you feel your beets are done fermenting, store them in the refrigerator.
You can even drink the liquid – I believe it is called beet kvass. I mix mine with a bit of seltzer.
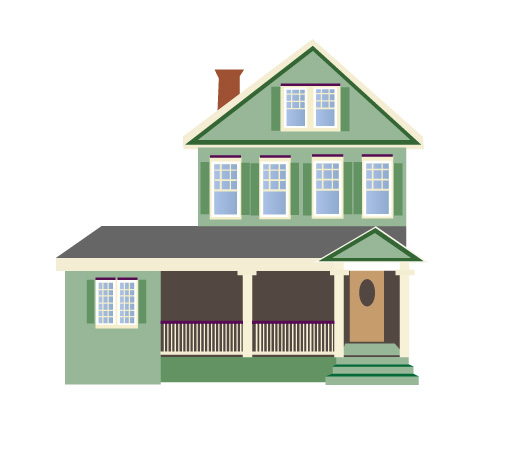
I worked on this tall house illustration back in December, and I’m presenting it to you today with a little secret. Shh, it’s not quite official and may be going slowly, but this house illustration and the house illustration I posted in late December will be part of a new “mural” painting that will appear on my leoraw.com home page. I came up with the idea about two years ago to redo my home page completely and give it a “Highland Park, NJ” look – to me, that meant the old houses of Highland Park. And some trees. An old-fashioned suburban look perhaps. I started working on the actual “mural” or banner earlier this week – it needs a third house, so that is on the list to be done.
My next step will be either cloud or tree illustrations – which should it be? Clouds or trees, anyone?
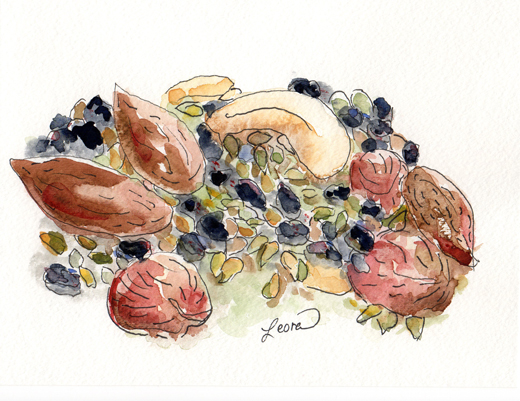
Nuts, Raisins and Sunflower Seeds, watercolor and ink pen by Leora Wenger, 2014
I painted this scene of nuts, raisins and sunflowers seeds for the food exercise in One Watercolor a Day. I’m not convinced of the scale I chose – perhaps since I made the nuts as big as I did, the sunflower seeds should be bit bigger? But no point to criticizing one’s own work – here it is for you to view. In the Facebook group for One Watercolor a Day, someone painted a lobster. It was quite a painting – lively and colorful. As I keep kosher, I would not have considered lobster for a food study, but that’s the sort of range one gets with these exercises. I also did a watercolor food study of beets – perhaps I will post that one closer to Pesach (Passover) and tell you how to make fermented beets, one of my favorite foods.
My son bought a new printer, an Epson XP-310 (or I bought it for him). I used the scanner for this painting, and I was quite pleased with the results – no more excess gray. I may buy a standalone scanner so I will have a larger scanner (the Epson XP-310 is quite small). When I do, it most probably will be an Epson.
The next watercolor exercise I plan to try is to paint some toys. I have a doll in mind to add to my still life. What other toys should I add? We still do have plenty of toys in this house, even if my children are no longer little.